


Shutterstock Contributor Keyword Tool
If you sell photos on Shutterstock and are looking for a way to simplify keyword selection, a great free solution is the shutterstock contributor keyword tool.
Of course, you first need to be registered as a Shutterstock contributor. To do that, go to:
https://submit.shutterstock.com/
Once you're logged in, click the “Upload” button in the upper-right corner to start uploading your files:

After the upload is complete, you'll see a notification in the lower-right corner of the page:

Click “Go to portfolio” to move to the section where you can start adding titles and descriptions to your images.
I uploaded a set of editorial photos of a KFC restaurant. Photos of fast food chains (like KFC, McDonald's, Burger King, Five Guys) sell very well — not only on Shutterstock, but also on Adobe Stock and Dreamstime.
Using the shutterstock contributor keyword tool
Now it’s time to use the shutterstock contributor keyword tool itself.
I recommend first selecting similar images to apply the same list of keywords to all of them.
In my case, I chose 5 photos of the exterior of a KFC restaurant — all showing the KFC sign and the iconic Colonel Sanders logo:

Once you’ve selected the images, look at the right-side panel and scroll down slightly — you’ll find a link to the keyword tool:

Clicking the link will likely show you a message:
“This will open the keyword suggestion tool in a new tab. You can copy keywords and paste them to your selected content when you return to this screen.” That’s fine — just click “I understand, continue.” The keyword tool will now open.
To get keyword suggestions for your selected photos, enter one or more related terms. I typed “KFC sign”, though just “KFC” would’ve worked too.
You can also choose the content type — I selected “photos” since I’m working with images, then clicked the search icon:

The tool will now show you multiple images that include the keyword you entered. All you have to do is select at least three photos that closely match yours.
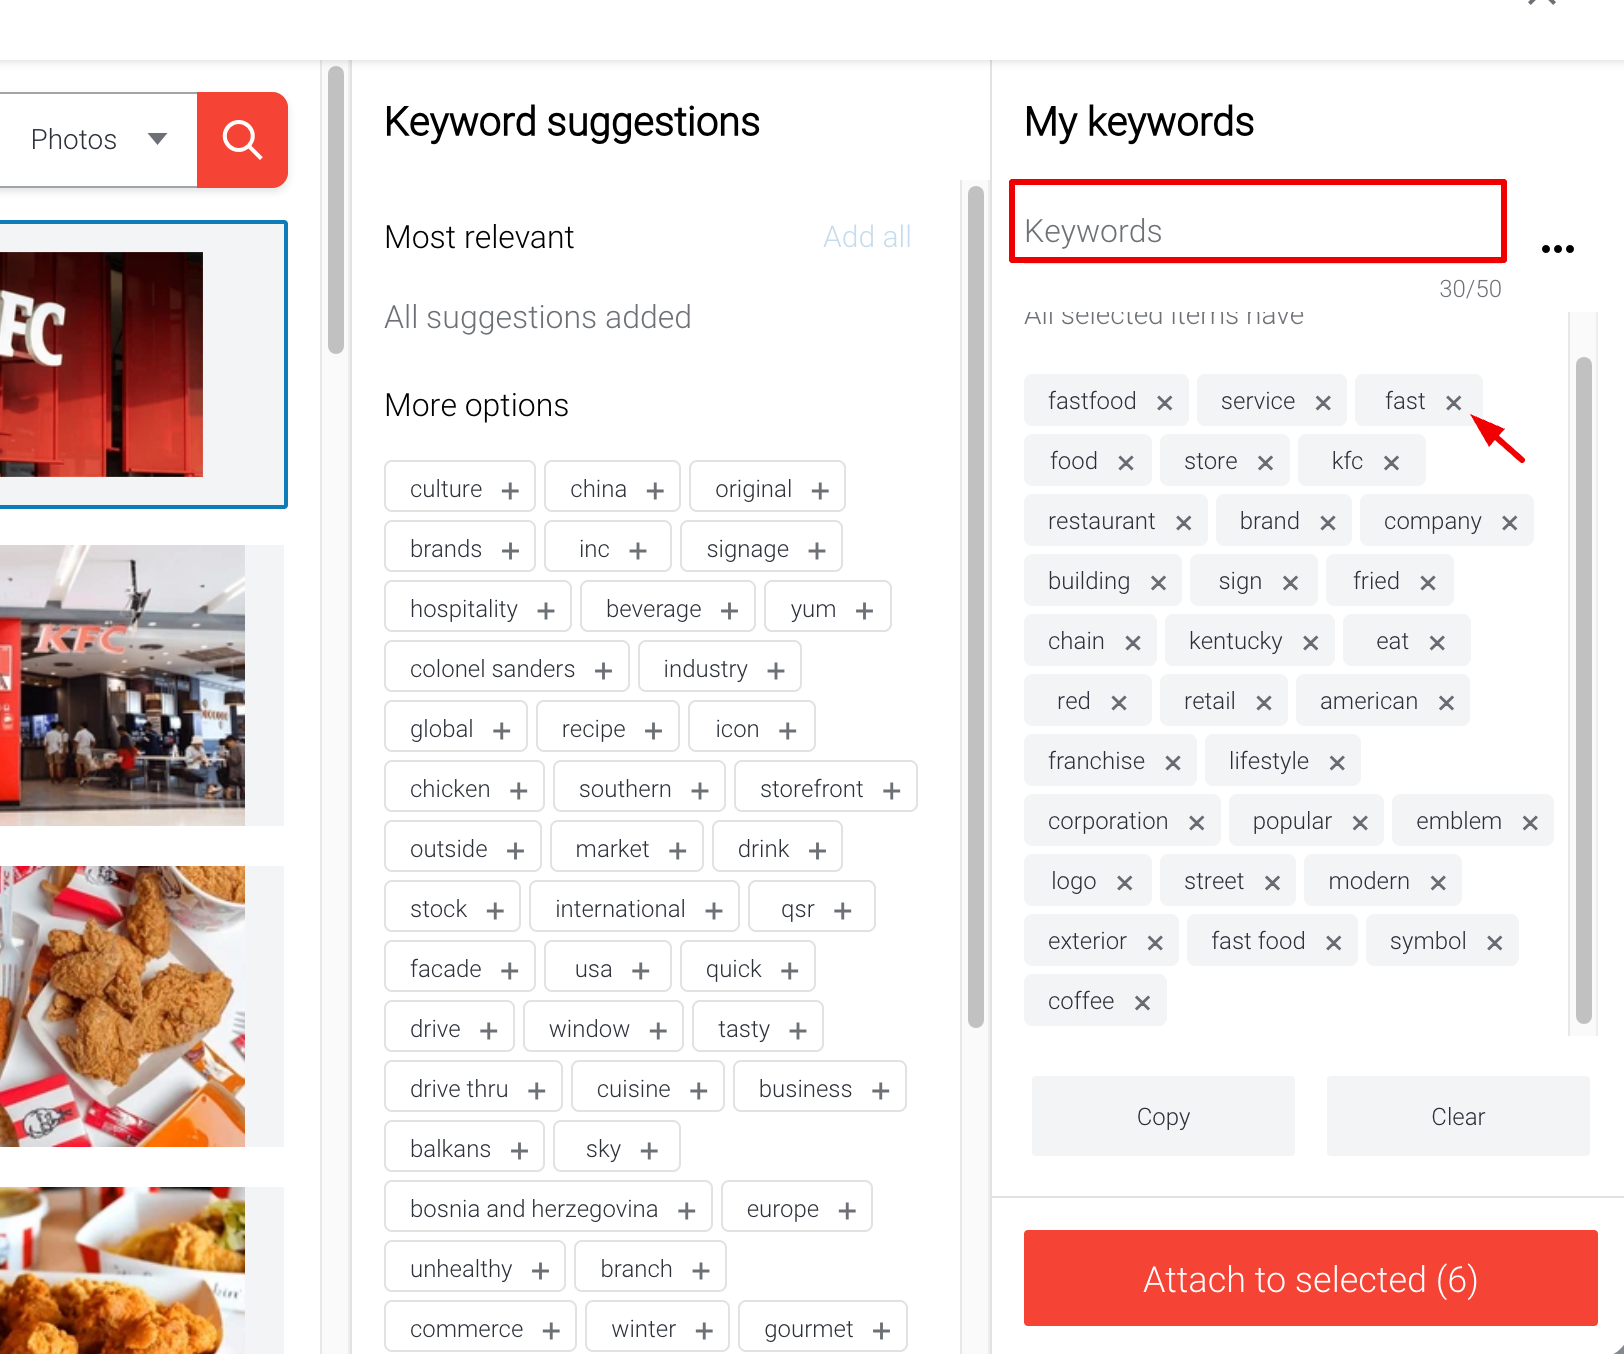
Once selected, you’ll see suggested keywords appear on the right side:

You can either click “Add All” to quickly gather keywords and remove irrelevant ones later, or you can manually add keywords one by one by clicking the plus icon. To save time, I recommend clicking “Add All.”

The keywords will move to the far-right column, where you can delete anything unrelated or add any terms that might be missing.
Once everything looks right, click the red “Attach to selected” button. If this button is faint or unclickable, it usually means your photos weren’t properly selected. Just select them again and repeat the steps:
You can now continue editing the keywords:

Before submitting, be sure to write a unique description for each image.
Unfortunately, the Shutterstock tool doesn’t generate descriptions for you.
You can look at similar photos on stock platforms and borrow ideas — just make sure to rephrase the descriptions. Unique descriptions help your work stand out and get found more easily.
Pro tip for those who upload regularly
Shutterstock contributor keyword tool is great for small batches of images.
But if you’re uploading large volumes of content, you’ll quickly realize how time-consuming keywording and metadata entry becomes — whether it’s photos or videos.
What’s the solution?
I recommend using TagWithAI — a service that not only automatically generates relevant keywords for your files, but also creates titles and descriptions (which some stock platforms require).You can test it free on your first 10 photos or videos.
It’s a huge time-saver — giving you more time to focus on creating new content.
Learn more about how to use our AI keywording tool here.
Leave a Reply
Copyright © 2025 TagWithAi
No comments yet.